
Difficulty: ★
This post contains affiliate links, meaning the writer may get a small commission if you decide to make a purchase through the links below, at no cost to you.
Any speciality products used (such as fragrances, colourants and molds) are from our Fizz Fairy website and are linked to be found and purchased through the site. Much of the additional equipment that is shown in my social media and blog content, can be found in our Amazon Storefront. I've only included products I've personally tried that I think work great for makers, or that are a close match in case a product is sold out. I hope this is helpful in your creating and crafting, especially for our Canadian customers also using Amazon.ca!

The best kinds of bath and body recipes are the ones with infinite possibilities. While bubble scoops might be a classic in the handcrafted bath industry, they continue to be altered and modernized summer after summer.
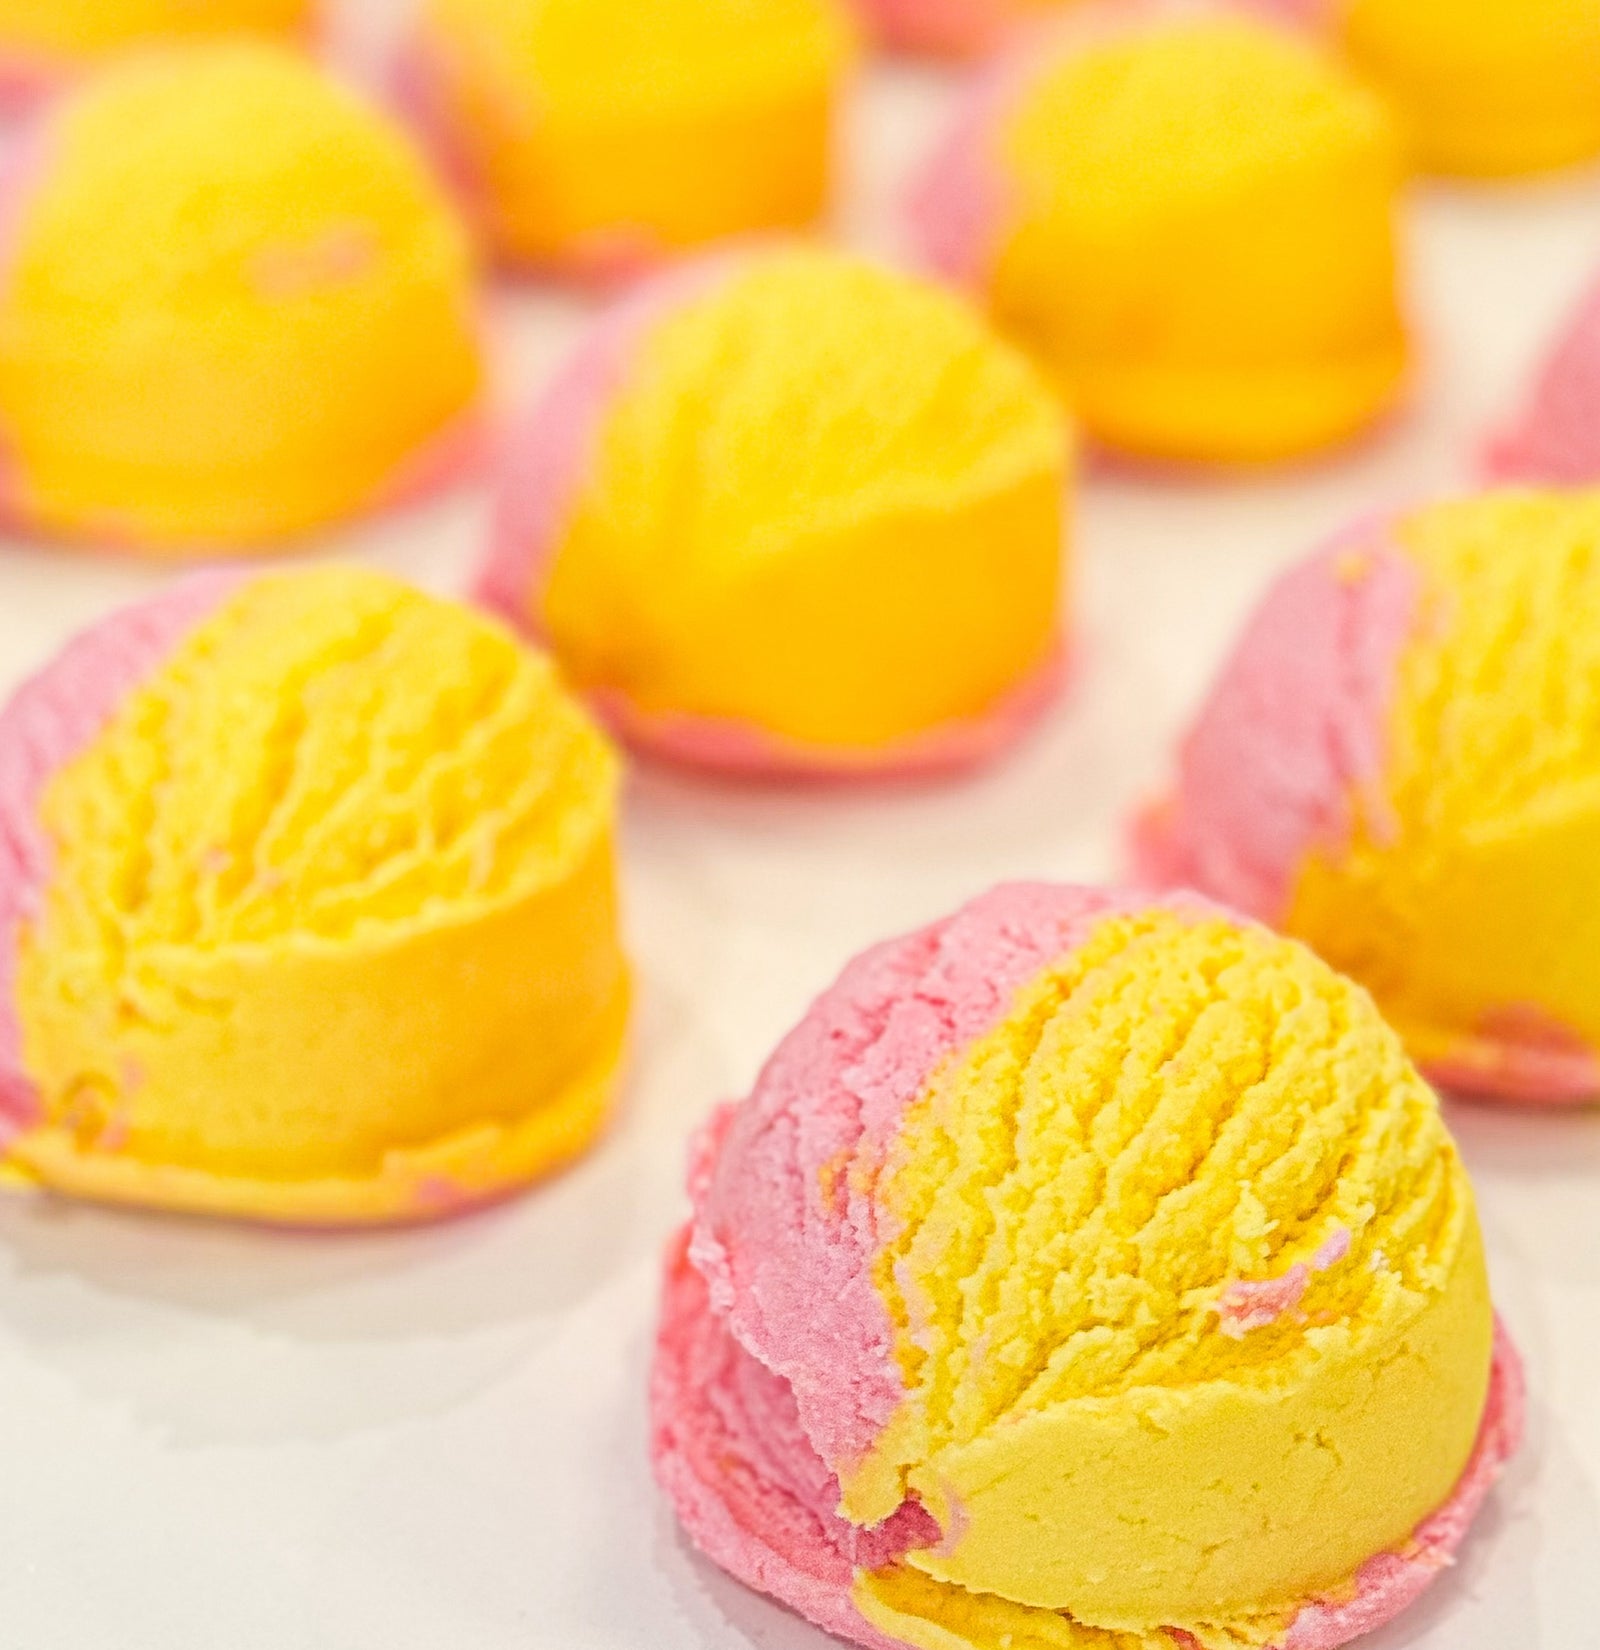
Today I'm sharing a basic recipe for these sweet Summer Bubble Scoops, but it is highly adaptable depending on preference. This recipe is SO easy and turns out so cute - looking exactly like ice cream scoops! So, after you've tried it even once you can start experimenting. Maybe you'll be making a mint chocolate inspired scoop, complete with chunks of chocolate-scented cocoa butter and a mint green peppermint mocha-scented ice cream? Or, maybe this is the perfect time to use Fizz Fairy's Grilled Peaches and French Vanilla Ice Cream fragrance oil for some juicy, sunset-hued scoops!
Wait, in case anyone is currently wondering "what even is a bubble scoop, anyway?" - let me give a quick debriefing! At its core, a bubble scoop is basically a solid bubble bath or bubble bar. This means it's also used in the same way. It can be crumbled under warm, running water to create a luxe, frothy foam in the bath. Or, better yet, it can be cut or crumbled and placed into a metal sifter, which is then placed under running water to create even more foam. The surfactant in this recipe is activated by agitation, so the more fine and abundant the solid bubble bath pieces, the more the agitation from the running water will produce bubbles!
One great part about solid bubble bath is that it doesn't contain any fillers. Every ingredient has a purpose, and the ingredients are simple. It may not create a bathtub overflowing with bubbles, but it absolutely will produce a fun, frothy, foamy bath that is even nicer for your skin than it is to look at!
Summer Bubble Scoops Recipe
Yield: 16-18 Scoops
Ingredients:
- 25 oz Baking Soda
- 7 oz Citric Acid
- 4 oz Cream of Tartar
- 15 oz SLSA
- 1 tsp White Kaolin Clay
- 4.5 oz Deodorized Cocoa Butter
- 6 oz Shea Butter
- 1 oz Polysorbate 80
- 1 oz Liquid Glycerin
- 1 oz Fresh Watermelon Lemonade Fragrance Oil
- 2 tsp. Yellow 5 Lake Colourant
- 2 tsp. Electric Watermelon Lake Colourant
Equipment:
- Scale
- Microwavable Bowl or Measuring Cup
- Mixing Bowls
- Measuring Spoons
- Ice Cream Scoop (Large)
- Wax/Parchment Paper
- Safety Equipment (Gloves, Protective Eyewear, Mask)
- Optional but handy: Thermometer
Instructions:
1. In a small heat-safe container, you want to add 6 ounces of shea butter, 4.5 ounces of deodorized cocoa butter, 1 ounce of glycerin, and 1 ounce of polysorbate 80. You may want to cut your butters up into smaller chunks ahead of time, so that they melt more quickly and evenly. Place the container in the microwave to melt the butters using 30-60 bursts. The cocoa butter can take a little while to melt. Be careful when removing it from the microwave, as it may be very hot! I tend to take mine out even if the cocoa butter hasn't melted completely, as it will continue to melt after it's removed from the microwave.

2. Next, you'll add your dry ingredients to a large mixing bowl. Combine 25 ounces of baking soda, 7 ounces of citric acid, 4 ounces of cream of tartar, and 1 ounce of white kaolin clay. Mix these ingredients using gloved hands, breaking apart any clumps of baking soda as you mix.

3. Very carefully, add 15 ounces of SLSA to the mixing bowl. Add the SLSA very slowly and gently, as it is very fine and powdery, and it can become airborne very easily. You will want to wear a mask during this step to avoid breathing in any SLSA. While it isn’t dangerous, it is irritating to the throat and can make you cough. Then you can slowly mix the SLSA together with the other dry ingredients, again using gloved hands.

4. Once all your dry ingredients are mixed together, you may add about ⅓ of the melted butter mixture. The hotter the liquid ingredients are when added, the softer the final “dough” will be. However, adding the liquid when it’s hotter will reduce the potential need to microwave it later. Use your hands to incorporate the wet and dry ingredients together. If you prefer, you could also use a stand or hand mixer for this step. Make sure to incorporate any powders that tend to remain at the bottom of the bowl.

5.) Continue adding the wet ingredients to the dry, and mix together until fully incorporated. The final texture will be very similar to bread dough – soft, workable, and slightly sticky. The texture of the mixture depends on the temperature of the butters. The warmer the dough, the softer it will be. I find a dough temperature of about 85-100°F to be a great moldable texture, be it for making bubble scoops are another solid bubble bath variant. If your dough is cooler than that, you can place the entire mixture into the microwave for 10-20 seconds to warm it.

6.) You then want to add 1oz of fragrance oil to your melted butters. In this recipe, I'm using Fizz Fairy's fresh watermelon lemonade scent, but you can feel free to get creative with the Fragrance Oil! Just be mindful that those with a high vanillin content may need vanilla stabilizer added. Stir and set aside.

7.) If you want to make multi-coloured scoops, you should now divide your mix into multiple bowls. For these scoops, I used two colours, so I divided my mix into two bowls - but you could try three or even more colours! I chose to eyeball this, but you could also measure it out if you like to be precise. You can also add your colourant at this time. Lakes are a great option for solid bubble bath, as they give a bright colour payoff without the risk of bleeding. If you want to make the exact ones you see here, you should add 2 teaspoons of yellow 5 lake to one half of your mix, and 2 teaspoons of electric watermelon lake to the other have of your mix. Combine each of these well using gloved hands.

8.) Fill the ice cream scoop using your mix and then remove the scoop on wax paper or parchment paper, just as you would a normal scoop of ice cream. For multi-coloured scoops, you simply add a little of each colour to the ice cream scoop. Continue to create the scoops until all the mixture is gone.


9.) Allow the bubble scoops to harden and dry for 2-3 days. If you live in a very humid area, it may take longer. After this time, they will be ready for packaging.

10.) To use, fill the tub with hot water. Once it's about ¾ full, break up a bubble scoop directly under the faucet to activate the bubbles. Alternatively, you can cut or break one up beforehand, placing the crumble into a metal strainer which can then be held under the faucet for a luxurious, frothy bath. These bubble scoops have a shelf life of about a year, if stored in a cool, dark location. Enjoy!
However you choose to recreate this recipe is up to you - there are so many incredible choices to make when it comes to these! If you do try this recipe, make sure you tag us so we can adore and share your creations! Please leave any comments or questions below and thanks for reading!
- Lindsay at Fizz Fairy
____________________________________
*All of the above content is original and belongs to Fizz Fairy Inc. If you would like to use any of this content, we ask that you please give us credit!*