
Difficulty: ★
This post contains affiliate links, meaning the writer may get a small commission if you decide to make a purchase through the links below, at no cost to you.
In the past, I had always made bath crumble recipes with kids in mind, as it was an easy way for parents to easily add a little something to their child's bath. I remember I once had a customer at a pop-up who told me she was purchasing the crumble for herself, as she too just liked that "little something" for herself. This immediately had me wondering, why don't I make a crumble for adults, too?
Whether you're looking for a new kids' product to add to your current line, or you want to create a new product for your adults who are happy adding just a hint of colour and fragrance to their bath - this recipe is a perfect choice for you! It is easily adaptable to any colours or fragrances you have in mind for a certain theme or season, and the packaging options are endless. This crumble dries matte and hard, and can be placed in anything from bags to jars to boxes. What's also great is this recipe can be easily doubled (or tripled!) depending on how much crumble you'd like to make.
While there are many different bath crumble recipes available on the internet, this one has been adapted to incorporate Fizz Fairy's fantastic lake colourants. Lakes are a great choice for this recipe as they give you the ability to easily alter the colour you're looking for, and still provide some colour in the bath. This recipe also uses the mild and gentle coconut-based surfactant, Cocamidopropyl Betaine, and is affordable to make - further justifying it as a perfect option for all bath lovers!

Ingredients:
Embellishments: (Optional)
- 150 gr Baking Soda
- 75 gr Citric Acid
- Witch Hazel (in a Spray Bottle for Spritzing)
Crumble:
- 450 gr Baking Soda
- 224 gr Citric Acid
- 60 gr Kaolin Clay
- 60 mL Cocamidopropyl Betaine (Coco Betaine)
- 16 mL Fragrance Oil (I used our Brazilian Bum Bum Dupe!)
- 16 mL Polysorbate 80
- 1/4 tsp Lake of Choice + 1/2 tsp Lake of Choice (variable; this will give you two-toned crumble. alternatively, you could use two or more colours for multi-coloured crumble! Here, I used our Blueberry Lake)
Equipment:
- Scale
- Large Mixing Bowl
- Medium Mixing Bowl
- Mini Measuring Spoons
- Metal Spatula/Soap Cutter
- Safety Equipment (Gloves, Mask, Safety Glasses)
- 2 Baking Sheets OR a Large Surface Covered with Wax Paper (this recipe has a drying time of about 24 hours)
- Silicone or Plastic Mold (Optional if creating embellishments for top of crumble)
- Packaging of choice
Directions:
Embellishments:
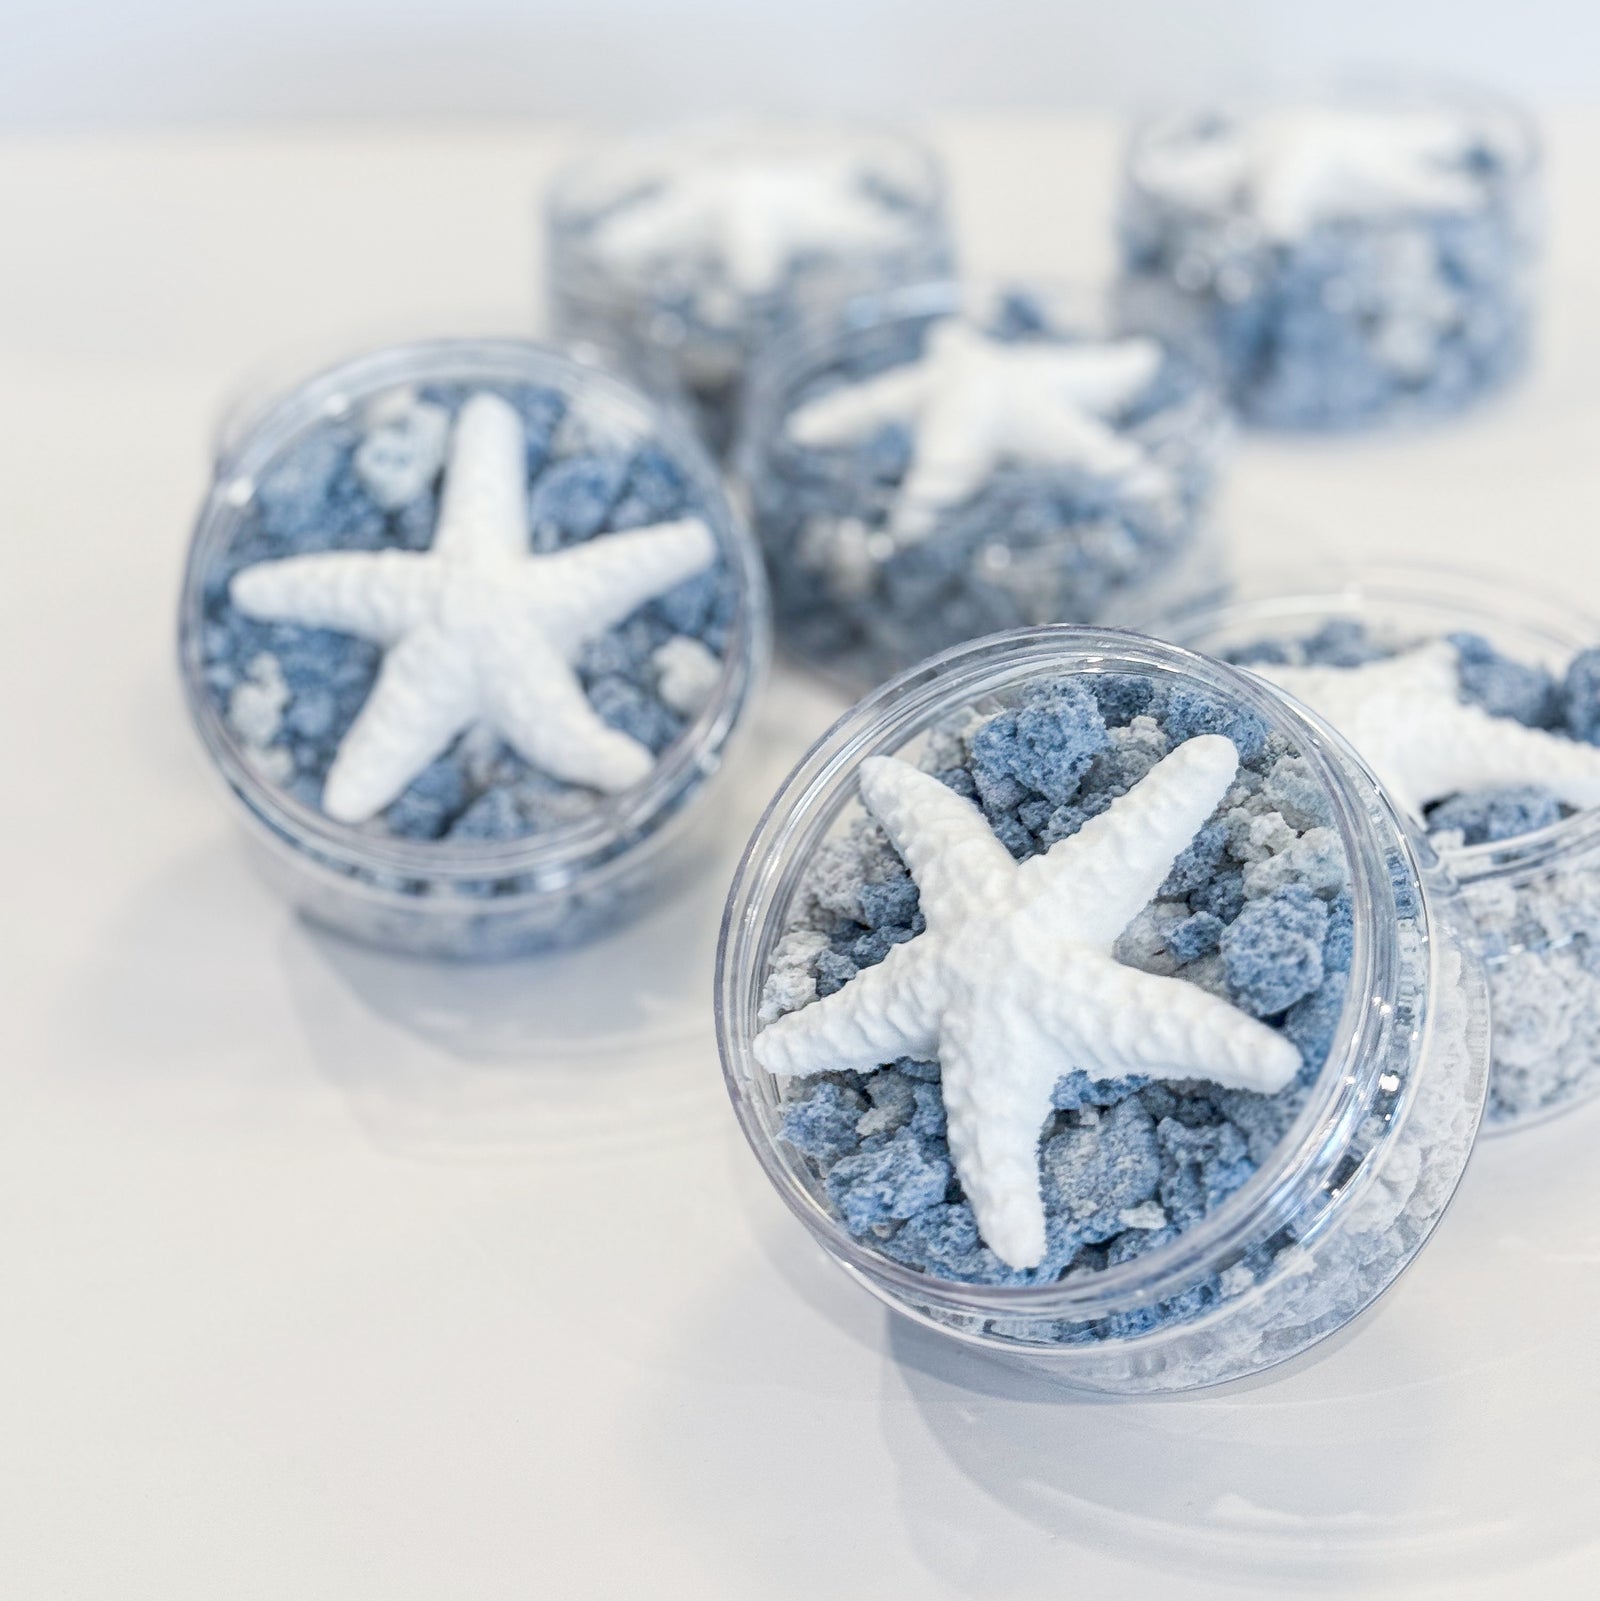
1. Start by making any embellishments. In the photos I've used, I chose to make a starfish to put on top of my crumble. To do this, simply combine two parts baking soda to one part citric acid and mix well. I used 150 grams of baking soda and 75 grams of citric acid. Note that you may need more or less, depending on your chosen mold(s).

2. Next, spritz a few sprays witch hazel into your dry mix. You want to continue spritzing and mixing until your mixture comes to be the consistency of set sand.


3. Firmly fill your chosen mold(s)! You can choose any silicone or plastic mold with this recipe. Silicone ones can be a little finicky, but will dry hard if packed well. Leave these filled molds to completely dry overnight.

Crumble:
1. Place your large mixing bowl on your scale and tare. Add baking soda, citric acid and kaolin clay to the bowl and mix using gloved hands, breaking apart any clumps in the process.

2. Now, we want to divide the dry mix into two even batches. Remove your large mixing bowl from your scale, placing your medium mixing bowl on it instead, taring once again. Add one half of your mixture, or 367 grams, to the your medium mixing bowl.

4. To the large mixing bowl, add 8 mL of fragrance oil (I used Fizz Fairy's Brazilian Bum Bum Dupe!), 8mL of polysorbate 80 and 30mL coco betaine, as well as 1/4 tsp of your lake of choice (I chose to use Fizz Fairy's Blueberry Lake!) Mix quickly using gloved hands. The mixture will become wet and sticky - this is normal, do not over-mix.


5. Quickly transfer the mix to one of your sheet pans, or to your covered work surface. You want to spread it out relatively evenly, leaving space around the mix for it to grow and expand as it dries. Here, I'm using a foam board covered in wax paper. The mixture will foam up to about twice its size, but will then deflate and begin to harden as it dries. Allow it to dry for at least 24 hours.

6. Repeat step 4 here, adding 8 mL of fragrance oil, 8mL of polysorbate 80 and 30mL coco betaine to the mixture in this bowl. Also add 1/2 tsp of your lake of choice and mix well using gloved hands. (Again, I chose to add 1/4 tsp and 1/2 tsp of the same lake to each of my bowls to create a two-toned crumble, but you could instead use a different coloured lake here - the choice is yours!) Once again, mix quickly using gloved hands. Do not over mix.

8. Quickly transfer the mix to your second sheet pan, or to your covered work surface, spreading it relatively evenly, and leaving space around the mix for it to grow and expand as it dries. Allow it to dry for at least 24 hours.

9. After 24 hours, you can pop out any embellishments you've made.

10. After 24 hours it's also time to break apart your bath crumble! If you used a pain, then using either a metal spatula or soap cutter may work best. If you used wax paper instead, then it should be easy to lift the wax paper and break apart your crumble by hand. I like to separate my crumble into two bowls.


11. Finally, fill your containers of choice using alternating colours, I personally used 8oz plastic jars, but this crumble looks great in a variety of packaging! Add any embellishments on top or throughout.


I personally love this take on bath crumble in a more adult-form and hope you do as well! If you do try this recipe, make sure you tag us so we can adore and share your creations! Please leave any comments or questions below and thanks for reading!
- Lindsay at Fizz Fairy
____________________________________

Ingredient Label: Baking Soda, Citric Acid, Kaolin, Cocamidopropyl Betaine, Fragrance, Polysorbate 80, CI73015, Hamamelis Virginiana Leaf Extract
*All of the above content is original and belongs to Fizz Fairy Inc. If you would like to use any of this content, we ask that you please give us credit!*